When you click on links to various merchants on this site and make a purchase, this can result in this site earning a commission. Affiliate programs and affiliations include, but are not limited to, the eBay Partner Network.
Price: $225.20
Hyundai Tiburon 2.7L 2003-2008
Fitment:
Hyundai Tiburon 2.0L 2003-2008Hyundai Tiburon 2.7L 2003-2008
Features:
【Quality】100% brand new,Strictly produced according to the standard and the quality and stability of the product are better.
【Easy To Install】Ensure precise fit and quickly replace compete strut.
【Recover Performance】 Replacing our struts assembly, shorten the braking distance, and increase the safety distance,improve steering response, reduce stopping distance and give you more confidence in driving.
【Increase Tire Grip】By increasing the spring stiffness coefficient, the rapid vibration of the wheel is suppressed, the tire is prevented from leaving the road, and the exercise stability is improved.
【Bounce Reduction】 Damping rods reduce body vibration and bounce by generating resistance through the flow of fluid to absorb or slow down the direct impact of energy.
【Vehicle Compatibility】Please check the description and compatibility chart before your purchasing, if you have any question regarding our this product.
Package Include:
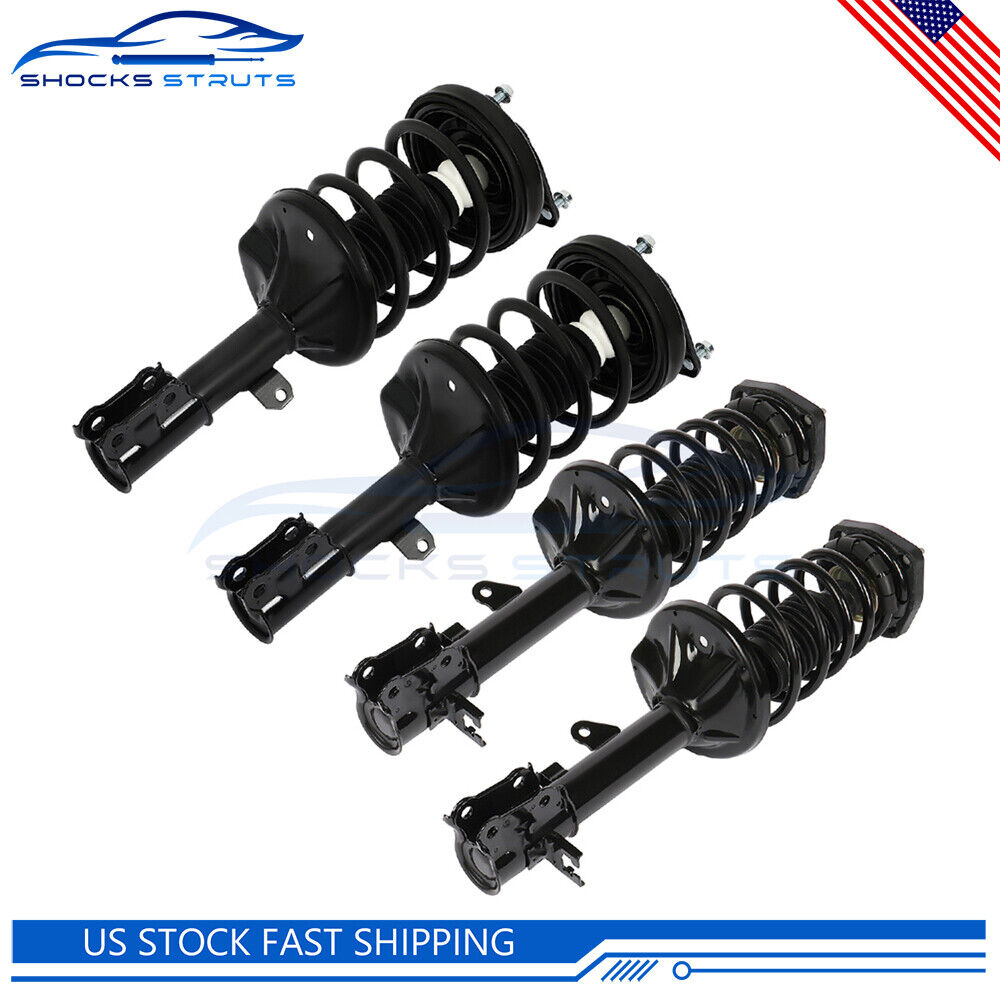
- 2x Complete Struts Assembly
We'll ship the struts separately in two pakages if the full set is over weight. Notice please!
How to Install :
- Step 1: Before You Lift the Vehicle, Loosen Lug Nuts One Full Turn.
- Step 2: Jack up Vehicle and Use Jack Stands for Safety & Remove the Tire from the Rotor.
- Step 3: (Wheel Alignment Is Necessary After Strut Replacement.) Marking the Position of All the Bolts Will Help Keep the Alignment Close to Original and save Time Aligning. Use a Colored Pencil to Mark the Old Strut on the Bolt.
- Step 4: Use Penetrating Oil (Such As Wd40) to Coat Any Rusted Fasteners, Let Soak for Approximately 1 Hour.
- Step 5: (Optional) While Waiting for Oil to Soak, Take This Time to Inspect All Other Components That May Need Replacement (Brake Pads, Rotors, Brake Hoses, Ball Joints, Cv Boots, Tie Rod Ends, Bushings, Sway Bars, Etc).
- Step 6: Remove Any Brake Line or Wire Attachments from the Strut Body. Do Not Disconnect Brake Lines (If Possible)! Opening Brake Lines Will Require Bleeding of the Brake System.
- Use Extreme Caution When Removing Brake Lines from Your Struts, As Any Damage to Your Brake Line Can Result in Expensive and Time Consuming Repairs.
- Step 7: Remove Sway bar Attached to the Strut Assembly or Control Arm.
- Step 8: Remove the Tie Rod (Only If It Attached to the Body of the Strut, If Not Leave It Attached to the Steering Knuckle).
- Step 9: Remove the Strut to Knuckle Bolts at the Bottom of the Strut. on some Vehicles, the Brake Caliper and Rotor May Need to Be Removed to Gain Access.
- Step 10: Remove the Upper Mounting Plate Bolts Located in the Engine or Trunk Compartment. Do Not Remove the Center Retaining Nut! It Is Not Safe to Unload the Spring from the Assembly in This Position.
- Step 11: Carefully Remove the Old Strut Assembly from the Vehicle. Be Very Cautious Not to Let the Strut "Drop" down on Your Brake Line, Rotor or Drum.
- Step 12: Install the New Complete Strut Assembly in the Reverse Order As Above (Steps 11-6). Using an Anti-seize Compound on All Fasteners Is Suggested.
- Step 13: Carefully Double Check Your Work and Make Sure Everything Is Tightened to Manufacturers Torque Specifications.
- Step 14: Replace the Tire the Rotor and Tighten to Manufacturers Torque Specifications.
- Step 15: Slowly Lower the Vehicle down After Removing the Jack Stands. Pay Very Close Attention to Any Odd Sounds When the Vehicle Is Lowered Onto the New Complete Strut Assemblies.
- Step 16: It Is Very Important That You Immediately "Road Test" Your Vehicle Right Away to Ensure That Installation Was Done Properly. Listen and Feel for Common Signs of Incorrect Installation While Driving Slowly over Speed Bumps, Rough Road or Potholes.
Precautions for replacing the shock absorber
- 1. When installing a new shock absorber, you should pay attention to whether the model matches, please pay attention to the matching model list before purchasing, and confirm whether the left and right are correct.
- 2. Check the quality status of the new shock absorber, such as whether there is oil leakage in the appearance, etc., pay special attention to the surface of the piston not to be bumped.
- 3. Professional tools must be used during installation, and the shock absorber must not be forcibly installed.
- 4. Pay attention to whether the installation position between the shock absorber and the body and the car is correct.
- 5. During the assembly process, be sure to protect the surface of the piston rod, and avoid using tools to pull the piston rod or bump or scratch the piston rod, otherwise the shock absorber will leak oil.
- 6. All nuts should be new and tightened according to the specified parameters of the vehicle to ensure that the tightening torque of the connection part meets the specified parameters of the vehicle.
- 7. When tightening the nuts of the connecting part, it should be carried out in the natural state of the tire and meet the specified parameters of the vehicle.
Welcome to theshocksstruts!!!
Item SpecificsWarranty 1 YearBrand shocksstrutsFitment Type Direct ReplacementManufacturer Part Number E83468001CPAdjustable YesGreasable or Sealed SealedPlacement on Vehicle FrontQuantity 4 piecesPart Type Full Strut AssemblyInterchange Part Number 172191,172192,172193,172194Superseded Part Number 4 Piece Set Complete Strut Assembly & Quick Strut ReplacementPlatform UniversalIncluded Hardware NoneOE Spec or Performance OE SpecSurface Finish Powder CoatCustom Bundle YesKit Parts Included Shock Aborber,Boot,Bumper Kit,Spring Seat,Coil Spring,IsolatorGas Charged Shock YesProduct Type Complete Struts Assembly with Coil SpringModified Item NoMaterial Iron,Aluminium Alloy,RubberReturn Policy Free Return on damaged or defective itemsQuantity 4 piecesReturn Policy Free Return on damaged or defective items
Payment 1.We only accept PayPal.2.Please do not use the PayPal note field to indicate us to ship to other address. The note there will NOT be read. If you want to change the shipping address, please contact us by eBay messages.3.(if you want cancel orders or change address pls contact us within 6 hours after payment,or we are not responsible for shipping a replacement.)4.Payment must be received within 10 days as auction ended or order might be delayed.Shipping Product will be shipped within 3 business days after full payment is received and verified. Delivery Time is about 3-7 business days to most of countries.All domestic orders will be shipped via USPS, UPS or FedEx from our US warehouse and usually arrives to your door in about 3-5 business days.We ship the package to your shipping address in eBay instead of the one in PayPal. Please tell us your shipping address if it is different from the one in eBay.The tracking number will be given for the customer to check the shipping status online (registered or faster service only).We are not responsible for any wrong or undeliverable addresses. Please verify and update your shipping address on eBay during checkout.Returns WARNING: Cancer and Reproductive Harm - www.P65Warnings.ca.gov.We stand behind every product we sell.All of our brand new items come with a 60-Days money-back guarantee.We define the item as defective only if it doesn't function as described.It is the buyer's responsibility to understand the item description before bidding.We will replace the defective items, provided that they are in stock within the warranty period posted with the listing and the buyer return the original item and pay for the S&H cost for the replacement.We will refund the purchase price if the replacement is not available or buyer prefers a refund and send the original item back at his/her own cost.Shipping & handling cost are not refundable.Man-made damage by abuse or wrong operFeedback 1. We maintain high standards of excellence (five stars review)and strive for 100% customer satisfaction! FEEDBACK IS VERY IMPORTANT TO US. We request that you contact us immediately BEFORE you give us neutral or negative feedback, so that we can satisfactorily address your concerns.2. It is impossible to address issues if we do not know about them! DESCRIPTIONPAYMENTSHIPPINGRETURN POLICYCONTACT US Store CategoryStore Home Shocks Struts Complete Struts Struts & Suspension Kit Air Suspensions Lift Supports Strut Mount Coilover OtherHot Item Pair Rear Shocks & Struts For 2011-2019 Ford Fiesta 2011-2014 Mazda 2 1.5L 1.6L USD 36.22 4Pcs For Kenworth Goodyear Air Suspension Spring Bags 1R11-221 W01-358-9622 New USD 263.99 Pair Front Quick Complete Strut-Coil Spring For 2007-2017 Jeep Compass Patriot USD 114.19 For Toyota Corolla 2009-2013 Front 2 Shocks Struts & Coil Spring Mount Assembly USD 98.22 Front Rear Set of 4 For Chevrolet Tahoe Suburban GMC Yukon XL 1500 Shocks Struts USD 58.88 Excellent DeliveryHelp & InfoPayment PolicyShipping PolicyReturn PolicyFAQAbout Us For 2003-2008 Hyundai Tiburon Front Rear Complete Struts / Shock Coil Springs
Fitment:
Hyundai Tiburon 2.0L 2003-2008Hyundai Tiburon 2.7L 2003-2008
Features:
【Quality】100% brand new,Strictly produced according to the standard and the quality and stability of the product are better.
【Easy To Install】Ensure precise fit and quickly replace compete strut.
【Recover Performance】 Replacing our struts assembly, shorten the braking distance, and increase the safety distance,improve steering response, reduce stopping distance and give you more confidence in driving.
【Increase Tire Grip】By increasing the spring stiffness coefficient, the rapid vibration of the wheel is suppressed, the tire is prevented from leaving the road, and the exercise stability is improved.
【Bounce Reduction】 Damping rods reduce body vibration and bounce by generating resistance through the flow of fluid to absorb or slow down the direct impact of energy.
【Vehicle Compatibility】Please check the description and compatibility chart before your purchasing, if you have any question regarding our this product.
Package Include:
- 2x Complete Struts Assembly
We'll ship the struts separately in two pakages if the full set is over weight. Notice please!
How to Install :
- Step 1: Before You Lift the Vehicle, Loosen Lug Nuts One Full Turn.
- Step 2: Jack up Vehicle and Use Jack Stands for Safety & Remove the Tire from the Rotor.
- Step 3: (Wheel Alignment Is Necessary After Strut Replacement.) Marking the Position of All the Bolts Will Help Keep the Alignment Close to Original and save Time Aligning. Use a Colored Pencil to Mark the Old Strut on the Bolt.
- Step 4: Use Penetrating Oil (Such As Wd40) to Coat Any Rusted Fasteners, Let Soak for Approximately 1 Hour.
- Step 5: (Optional) While Waiting for Oil to Soak, Take This Time to Inspect All Other Components That May Need Replacement (Brake Pads, Rotors, Brake Hoses, Ball Joints, Cv Boots, Tie Rod Ends, Bushings, Sway Bars, Etc).
- Step 6: Remove Any Brake Line or Wire Attachments from the Strut Body. Do Not Disconnect Brake Lines (If Possible)! Opening Brake Lines Will Require Bleeding of the Brake System.
- Use Extreme Caution When Removing Brake Lines from Your Struts, As Any Damage to Your Brake Line Can Result in Expensive and Time Consuming Repairs.
- Step 7: Remove Sway bar Attached to the Strut Assembly or Control Arm.
- Step 8: Remove the Tie Rod (Only If It Attached to the Body of the Strut, If Not Leave It Attached to the Steering Knuckle).
- Step 9: Remove the Strut to Knuckle Bolts at the Bottom of the Strut. on some Vehicles, the Brake Caliper and Rotor May Need to Be Removed to Gain Access.
- Step 10: Remove the Upper Mounting Plate Bolts Located in the Engine or Trunk Compartment. Do Not Remove the Center Retaining Nut! It Is Not Safe to Unload the Spring from the Assembly in This Position.
- Step 11: Carefully Remove the Old Strut Assembly from the Vehicle. Be Very Cautious Not to Let the Strut "Drop" down on Your Brake Line, Rotor or Drum.
- Step 12: Install the New Complete Strut Assembly in the Reverse Order As Above (Steps 11-6). Using an Anti-seize Compound on All Fasteners Is Suggested.
- Step 13: Carefully Double Check Your Work and Make Sure Everything Is Tightened to Manufacturers Torque Specifications.
- Step 14: Replace the Tire the Rotor and Tighten to Manufacturers Torque Specifications.
- Step 15: Slowly Lower the Vehicle down After Removing the Jack Stands. Pay Very Close Attention to Any Odd Sounds When the Vehicle Is Lowered Onto the New Complete Strut Assemblies.
- Step 16: It Is Very Important That You Immediately "Road Test" Your Vehicle Right Away to Ensure That Installation Was Done Properly. Listen and Feel for Common Signs of Incorrect Installation While Driving Slowly over Speed Bumps, Rough Road or Potholes.
Precautions for replacing the shock absorber
- 1. When installing a new shock absorber, you should pay attention to whether the model matches, please pay attention to the matching model list before purchasing, and confirm whether the left and right are correct.
- 2. Check the quality status of the new shock absorber, such as whether there is oil leakage in the appearance, etc., pay special attention to the surface of the piston not to be bumped.
- 3. Professional tools must be used during installation, and the shock absorber must not be forcibly installed.
- 4. Pay attention to whether the installation position between the shock absorber and the body and the car is correct.
- 5. During the assembly process, be sure to protect the surface of the piston rod, and avoid using tools to pull the piston rod or bump or scratch the piston rod, otherwise the shock absorber will leak oil.
- 6. All nuts should be new and tightened according to the specified parameters of the vehicle to ensure that the tightening torque of the connection part meets the specified parameters of the vehicle.
- 7. When tightening the nuts of the connecting part, it should be carried out in the natural state of the tire and meet the specified parameters of the vehicle.
Welcome to theshocksstruts!!!
PaymentShippingReturnsFeedback 1.We only accept PayPal.2.Please do not use the PayPal note field to indicate us to ship to other address. The note there will NOT be read. If you want to change the shipping address, please contact us by eBay messages.3.(if you want cancel orders or change address pls contact us within 6 hours after payment,or we are not responsible for shipping a replacement.)4.Payment must be received within 10 days as auction ended or order might be delayed. Product will be shipped within 3 business days after full payment is received and verified. Delivery Time is about 3-7 business days to most of countries.All domestic orders will be shipped via USPS, UPS or FedEx from our US warehouse and usually arrives to your door in about 3-5 business days.We ship the package to your shipping address in eBay instead of the one in PayPal. Please tell us your shipping address if it is different from the one in eBay.The tracking number will be given for the customer to check the shipping status online (registered or faster service only).We are not responsible for any wrong or undeliverable addresses. Please verify and update your shipping address on eBay during checkout. WARNING: Cancer and Reproductive Harm - www.P65Warnings.ca.gov.We stand behind every product we sell.All of our brand new items come with a 60-Days money-back guarantee.We define the item as defective only if it doesn't function as described.It is the buyer's responsibility to understand the item description before bidding.We will replace the defective items, provided that they are in stock within the warranty period posted with the listing and the buyer return the original item and pay for the S&H cost for the replacement.We will refund the purchase price if the replacement is not available or buyer prefers a refund and send the original item back at his/her own cost.Shipping & handling cost are not refundable.Man-made damage by abuse or wrong oper 1. We maintain high standards of excellence (five stars review)and strive for 100% customer satisfaction! FEEDBACK IS VERY IMPORTANT TO US. We request that you contact us immediately BEFORE you give us neutral or negative feedback, so that we can satisfactorily address your concerns.2. It is impossible to address issues if we do not know about them!
All rights reserved.