When you click on links to various merchants on this site and make a purchase, this can result in this site earning a commission. Affiliate programs and affiliations include, but are not limited to, the eBay Partner Network.
Price: $15.90
- Double laser-welded stainless steel body protects against contamination
- Seared protection tube due to 100% functional quality test
- Pre-coated threads with anti-seize compound right out of the box
- "True Direct-fit" connectors and harness
- Base ceramic probe of Zirconium and Yttrium: Forms a tough base that resists cracking from mechanical and thermal shock
Features:
- Double laser-welded stainless steel body protects against contamination
- Seared protection tube due to 100% functional quality test
-
Pre-coated threads with anti-seize compound right out of the box
- "True Direct-fit" connectors and harness
- Base ceramic probe of Zirconium and Yttrium: Forms a tough base that resists cracking from mechanical and thermal shock
?
?Fitment:
2002-2004 Honda CR-V 2.4L
FAQ of oxygen sensor:
Question 1:Do I need to replace all of my oxygen sensors at once?
A: It is best to replace your sensors in pairs. For example, if you replace the downstream left sensor, you should also replace the downstream right. However, on most vehicles produced since 1996, replacing one sensor (especially the front engine monitoring sensor) will cause the ECU to set a code for the other sensors.
This is because the new sensor switching activity is much faster than that of the older aged sensors. It is probable that on most vehicles, the code will be set within 30-60 days AFTER the first sensor replacement.
Question 2:How do I locate specified sensor locations (B1S1, downstream left, etc.)?
A: Left and right sensor positions are found in reference to the rear of the engine (the side opposite of the belts).
Upstream (pre-cat) and downstream (post-cat) are found in reference to the catalytic converter.
Question 3:How to replace an oxygen sensor?
Step 1: Locate the oxygen sensor.
This sensor is usually located on your vehicle's exhaust pipe. If you see something attached to the pipe that looks like a spark plug, then you've found the sensor. You can also consult your car manual since the sensor's exact location depends on your vehicle's make and model.
Step 2: Disconnect the sensor's electrical wires.
Use screwdriver to pry the tabs that connect the sensor to your car's electrical system. Be careful not to nick nearby components.
Step 3: Remove the old oxygen sensor.
Get your hands on a wrench or a sensor removing socket to unscrew this component from the exhaust pipe. Most sensor types can be removed with an SAE 7/8-inch wrench, although it's best to consult your car's manual on what type of tool is best used.
Step 4: Check the new sensor if it has a built-in electrical connection.
If it comes with its own electrical connection, then you just have to reconnect it to your car's electrical system. However, if the new sensor is not equipped with its own electrical connector, you can reuse the old sensor's connector. You just need to cut out the connector from the old sensor, strip the wires, and attach it to the new sensor with butt connectors. To completely seal the connections, tape the wires up with strips of heat-sensitive shrink tape. Then take note of the manufacturer's instructions to know which wires should be tied together.
Step 5: Install the new oxygen sensor.
Screw the new sensor in place by using a wrench. Twist it counterclockwise to lock it in place. Make sure not to overtighten the sensor to prevent damaging the threads. Then plug the new or reused electrical connectors into your car's system.
Step 6: Clear the diagnostic code from your vehicle's ECU (engine control unit).
Once you've installed the new oxygen sensor, switch on the ignition so you could clear the code from the vehicle's ECU by using the diagnostic reader or scanner. After clearing the code, the check engine light will automatically switch off. Take your car for a test drive; you should be able to experience immediate improvements in your car's overall engine and emission performance.
Question 4:What is a California emissions sensor? How do I know if I need one?
A: California emissions O2 sensor is meant for vehicles that are designed to meet California emission regulations. Such vehicles should have a sticker under the hood or on the driver’s door jamb that identify them.
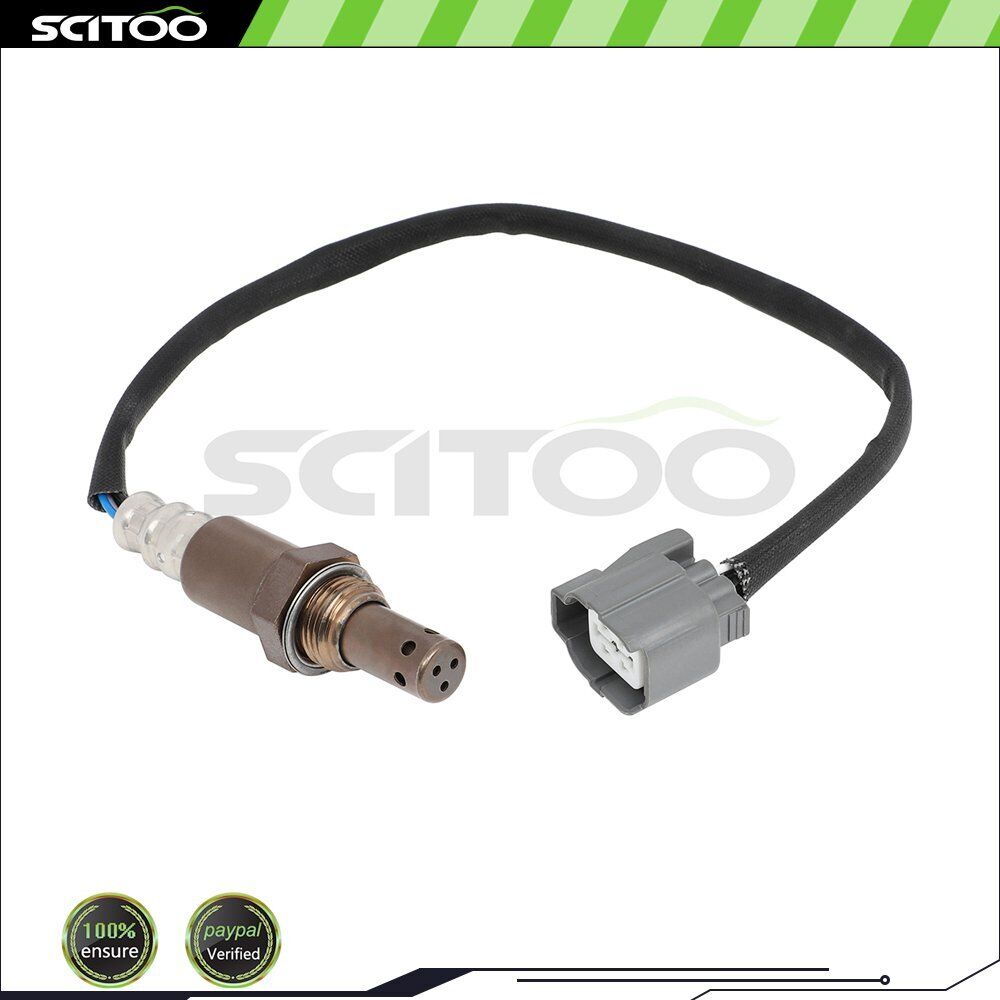
For 2002-2004 Honda CR-V 2.4L 02 O2 Oxygen Sensor Downstream 234-4125Features:
- Double laser-welded stainless steel body protects against contamination
- Seared protection tube due to 100% functional quality test
-
Pre-coated threads with anti-seize compound right out of the box
- "True Direct-fit" connectors and harness
- Base ceramic probe of Zirconium and Yttrium: Forms a tough base that resists cracking from mechanical and thermal shock
?
?Fitment:
2002-2004 Honda CR-V 2.4L
FAQ of oxygen sensor:
Question 1:Do I need to replace all of my oxygen sensors at once?
A: It is best to replace your sensors in pairs. For example, if you replace the downstream left sensor, you should also replace the downstream right. However, on most vehicles produced since 1996, replacing one sensor (especially the front engine monitoring sensor) will cause the ECU to set a code for the other sensors.
This is because the new sensor switching activity is much faster than that of the older aged sensors. It is probable that on most vehicles, the code will be set within 30-60 days AFTER the first sensor replacement.
Question 2:How do I locate specified sensor locations (B1S1, downstream left, etc.)?
A: Left and right sensor positions are found in reference to the rear of the engine (the side opposite of the belts).
Upstream (pre-cat) and downstream (post-cat) are found in reference to the catalytic converter.
Question 3:How to replace an oxygen sensor?
Step 1: Locate the oxygen sensor.
This sensor is usually located on your vehicle's exhaust pipe. If you see something attached to the pipe that looks like a spark plug, then you've found the sensor. You can also consult your car manual since the sensor's exact location depends on your vehicle's make and model.
Step 2: Disconnect the sensor's electrical wires.
Use screwdriver to pry the tabs that connect the sensor to your car's electrical system. Be careful not to nick nearby components.
Step 3: Remove the old oxygen sensor.
Get your hands on a wrench or a sensor removing socket to unscrew this component from the exhaust pipe. Most sensor types can be removed with an SAE 7/8-inch wrench, although it's best to consult your car's manual on what type of tool is best used.
Step 4: Check the new sensor if it has a built-in electrical connection.
If it comes with its own electrical connection, then you just have to reconnect it to your car's electrical system. However, if the new sensor is not equipped with its own electrical connector, you can reuse the old sensor's connector. You just need to cut out the connector from the old sensor, strip the wires, and attach it to the new sensor with butt connectors. To completely seal the connections, tape the wires up with strips of heat-sensitive shrink tape. Then take note of the manufacturer's instructions to know which wires should be tied together.
Step 5: Install the new oxygen sensor.
Screw the new sensor in place by using a wrench. Twist it counterclockwise to lock it in place. Make sure not to overtighten the sensor to prevent damaging the threads. Then plug the new or reused electrical connectors into your car's system.
Step 6: Clear the diagnostic code from your vehicle's ECU (engine control unit).
Once you've installed the new oxygen sensor, switch on the ignition so you could clear the code from the vehicle's ECU by using the diagnostic reader or scanner. After clearing the code, the check engine light will automatically switch off. Take your car for a test drive; you should be able to experience immediate improvements in your car's overall engine and emission performance.
Question 4:What is a California emissions sensor? How do I know if I need one?
A: California emissions O2 sensor is meant for vehicles that are designed to meet California emission regulations. Such vehicles should have a sticker under the hood or on the driver’s door jamb that identify them.
Item SpecificsOther Part Number 46667BAManufacturer Part Number CB050183-1S00Brand SCITOOManufacturer Warranty 1 YearUPC 601209285108Wire 4Wire Harness Length 297mmInterchange Part Number 234-4125Superseded Part Number 46527-B, 46669-BNumber of Pieces 1Modified Item NoCustom Bundle NoConnector Gender FemaleSensor Type HeatedThread Diameter 18mmUniversal Or Specific Fit OE SpecificFitment Type Direct ReplacementHousing Material MetalPosition on Vehicle DownstreamOutput Signal Range 0.2V - 0.8VType SensorFeatures Direct FitType SensorFeatures Direct FitShipping
WARNING: Cancer and Reproductive Harm - www.P65Warnings.ca.gov.
1. Package handling takes about 2 business days at our warehouse, so please make sure entering correct payment and shipping information before checking out. Once your payment is completed, we are not going to accept any more changes to your order.
2.All domestic orders will be shipped via USPS, UPS or Fedex from our US warehouse and usually arrives to your door in about 2-7 business days.
3.Local pick up is not available.
4.International Buyers C Please Note:
a. Import duties, taxes and charges are not included in the item price or shipping charges. These charges are the buyers responsibility.
b. Please check with your country customs office to determine what these additional costs will be prior to bidding/buying.]
[We only accept payment through PayPal. You can open a Paypal account at]
Returns1.All of our brand new items come with a 60-Days money-back guarantee.
2.We define the item as defective only if it doesn't function as described, It is the buyer's responsibility to understand the item description before bidding.
3.We will replace the defective items, provided that they are in stock within the warranty period posted with the listing and the buyer return the original item and pay for the S&H cost for the replacement.
4.We will refund the purchase price if the replacement is not available or buyer prefers a refund and send the original item back at his/her own cost.
5.Shipping& handling cost are not refundable.
6.Man-made damage by abuse or wrong operation is not covered by this warranty.
7.No product liability insurance is assumed.
8.Refunds will be credited within 5 to 7 business days of receiving the return. When we've received and processed the return, we will refund the applicable amount minus any Recovery Fees (See Details Below) for the amount you paid for the item(s), plus any applicable sales tax. ]
Q: How do I pay for my purchase?
A: MY store accepts PayPal.
Q: When will the item be shipped out?
A: This item will be shipped with 2 business day once payment completed.
Q: Where is my tracking number?
A: Please log on your account, click "my eBay"-->"my summary", or open your email box and find the shipping notification email.
Q: How do I return an item?
A: My tore accepts returns. Items must be returned within 60 days. Refunds will be given as money back. Please contact our customer service before you return an item. ]
1. We will leave a feedback once we get your payment.
2. If you are dissatisfied for any reason, please do contact us afeedback. We will work hard to make sure EVERY CUSTOMER 100% SATISFIED and resolve any problem for you and always leave a feedback to all our customers.
3. If you are satisfied with the product you received, wish you can leave us a feedback.
Features:
- Double laser-welded stainless steel body protects against contamination
- Seared protection tube due to 100% functional quality test
-
Pre-coated threads with anti-seize compound right out of the box
- "True Direct-fit" connectors and harness
- Base ceramic probe of Zirconium and Yttrium: Forms a tough base that resists cracking from mechanical and thermal shock
?
?Fitment:
2002-2004 Honda CR-V 2.4L
FAQ of oxygen sensor:
Question 1:Do I need to replace all of my oxygen sensors at once?
A: It is best to replace your sensors in pairs. For example, if you replace the downstream left sensor, you should also replace the downstream right. However, on most vehicles produced since 1996, replacing one sensor (especially the front engine monitoring sensor) will cause the ECU to set a code for the other sensors.
This is because the new sensor switching activity is much faster than that of the older aged sensors. It is probable that on most vehicles, the code will be set within 30-60 days AFTER the first sensor replacement.
Question 2:How do I locate specified sensor locations (B1S1, downstream left, etc.)?
A: Left and right sensor positions are found in reference to the rear of the engine (the side opposite of the belts).
Upstream (pre-cat) and downstream (post-cat) are found in reference to the catalytic converter.
Question 3:How to replace an oxygen sensor?
Step 1: Locate the oxygen sensor.
This sensor is usually located on your vehicle's exhaust pipe. If you see something attached to the pipe that looks like a spark plug, then you've found the sensor. You can also consult your car manual since the sensor's exact location depends on your vehicle's make and model.
Step 2: Disconnect the sensor's electrical wires.
Use screwdriver to pry the tabs that connect the sensor to your car's electrical system. Be careful not to nick nearby components.
Step 3: Remove the old oxygen sensor.
Get your hands on a wrench or a sensor removing socket to unscrew this component from the exhaust pipe. Most sensor types can be removed with an SAE 7/8-inch wrench, although it's best to consult your car's manual on what type of tool is best used.
Step 4: Check the new sensor if it has a built-in electrical connection.
If it comes with its own electrical connection, then you just have to reconnect it to your car's electrical system. However, if the new sensor is not equipped with its own electrical connector, you can reuse the old sensor's connector. You just need to cut out the connector from the old sensor, strip the wires, and attach it to the new sensor with butt connectors. To completely seal the connections, tape the wires up with strips of heat-sensitive shrink tape. Then take note of the manufacturer's instructions to know which wires should be tied together.
Step 5: Install the new oxygen sensor.
Screw the new sensor in place by using a wrench. Twist it counterclockwise to lock it in place. Make sure not to overtighten the sensor to prevent damaging the threads. Then plug the new or reused electrical connectors into your car's system.
Step 6: Clear the diagnostic code from your vehicle's ECU (engine control unit).
Once you've installed the new oxygen sensor, switch on the ignition so you could clear the code from the vehicle's ECU by using the diagnostic reader or scanner. After clearing the code, the check engine light will automatically switch off. Take your car for a test drive; you should be able to experience immediate improvements in your car's overall engine and emission performance.
Question 4:What is a California emissions sensor? How do I know if I need one?
A: California emissions O2 sensor is meant for vehicles that are designed to meet California emission regulations. Such vehicles should have a sticker under the hood or on the driver’s door jamb that identify them.
ShippingPaymentReturnsCustomer ServicesFeedback
WARNING: Cancer and Reproductive Harm - www.P65Warnings.ca.gov.
1. Package handling takes about 2 business days at our warehouse, so please make sure entering correct payment and shipping information before checking out. Once your payment is completed, we are not going to accept any more changes to your order.
2.All domestic orders will be shipped via USPS, UPS or Fedex from our US warehouse and usually arrives to your door in about 2-7 business days.
3.Local pick up is not available.
4.International Buyers C Please Note:
a. Import duties, taxes and charges are not included in the item price or shipping charges. These charges are the buyers responsibility.
b. Please check with your country customs office to determine what these additional costs will be prior to bidding/buying.]
[We only accept payment through PayPal. You can open a Paypal account at]
1.All of our brand new items come with a 60-Days money-back guarantee.
2.We define the item as defective only if it doesn't function as described, It is the buyer's responsibility to understand the item description before bidding.
3.We will replace the defective items, provided that they are in stock within the warranty period posted with the listing and the buyer return the original item and pay for the S&H cost for the replacement.
4.We will refund the purchase price if the replacement is not available or buyer prefers a refund and send the original item back at his/her own cost.
5.Shipping& handling cost are not refundable.
6.Man-made damage by abuse or wrong operation is not covered by this warranty.
7.No product liability insurance is assumed.
8.Refunds will be credited within 5 to 7 business days of receiving the return. When we've received and processed the return, we will refund the applicable amount minus any Recovery Fees (See Details Below) for the amount you paid for the item(s), plus any applicable sales tax. ]
Q: How do I pay for my purchase?
A: MY store accepts PayPal.
Q: When will the item be shipped out?
A: This item will be shipped with 2 business day once payment completed.
Q: Where is my tracking number?
A: Please log on your account, click "my eBay"-->"my summary", or open your email box and find the shipping notification email.
Q: How do I return an item?
A: My tore accepts returns. Items must be returned within 60 days. Refunds will be given as money back. Please contact our customer service before you return an item. ]
1. We will leave a feedback once we get your payment.
2. If you are dissatisfied for any reason, please do contact us afeedback. We will work hard to make sure EVERY CUSTOMER 100% SATISFIED and resolve any problem for you and always leave a feedback to all our customers.
3. If you are satisfied with the product you received, wish you can leave us a feedback.
Copyright of SCITOO-AutoParts . All rights reserved.