When you click on links to various merchants on this site and make a purchase, this can result in this site earning a commission. Affiliate programs and affiliations include, but are not limited to, the eBay Partner Network.
Price: $169.00
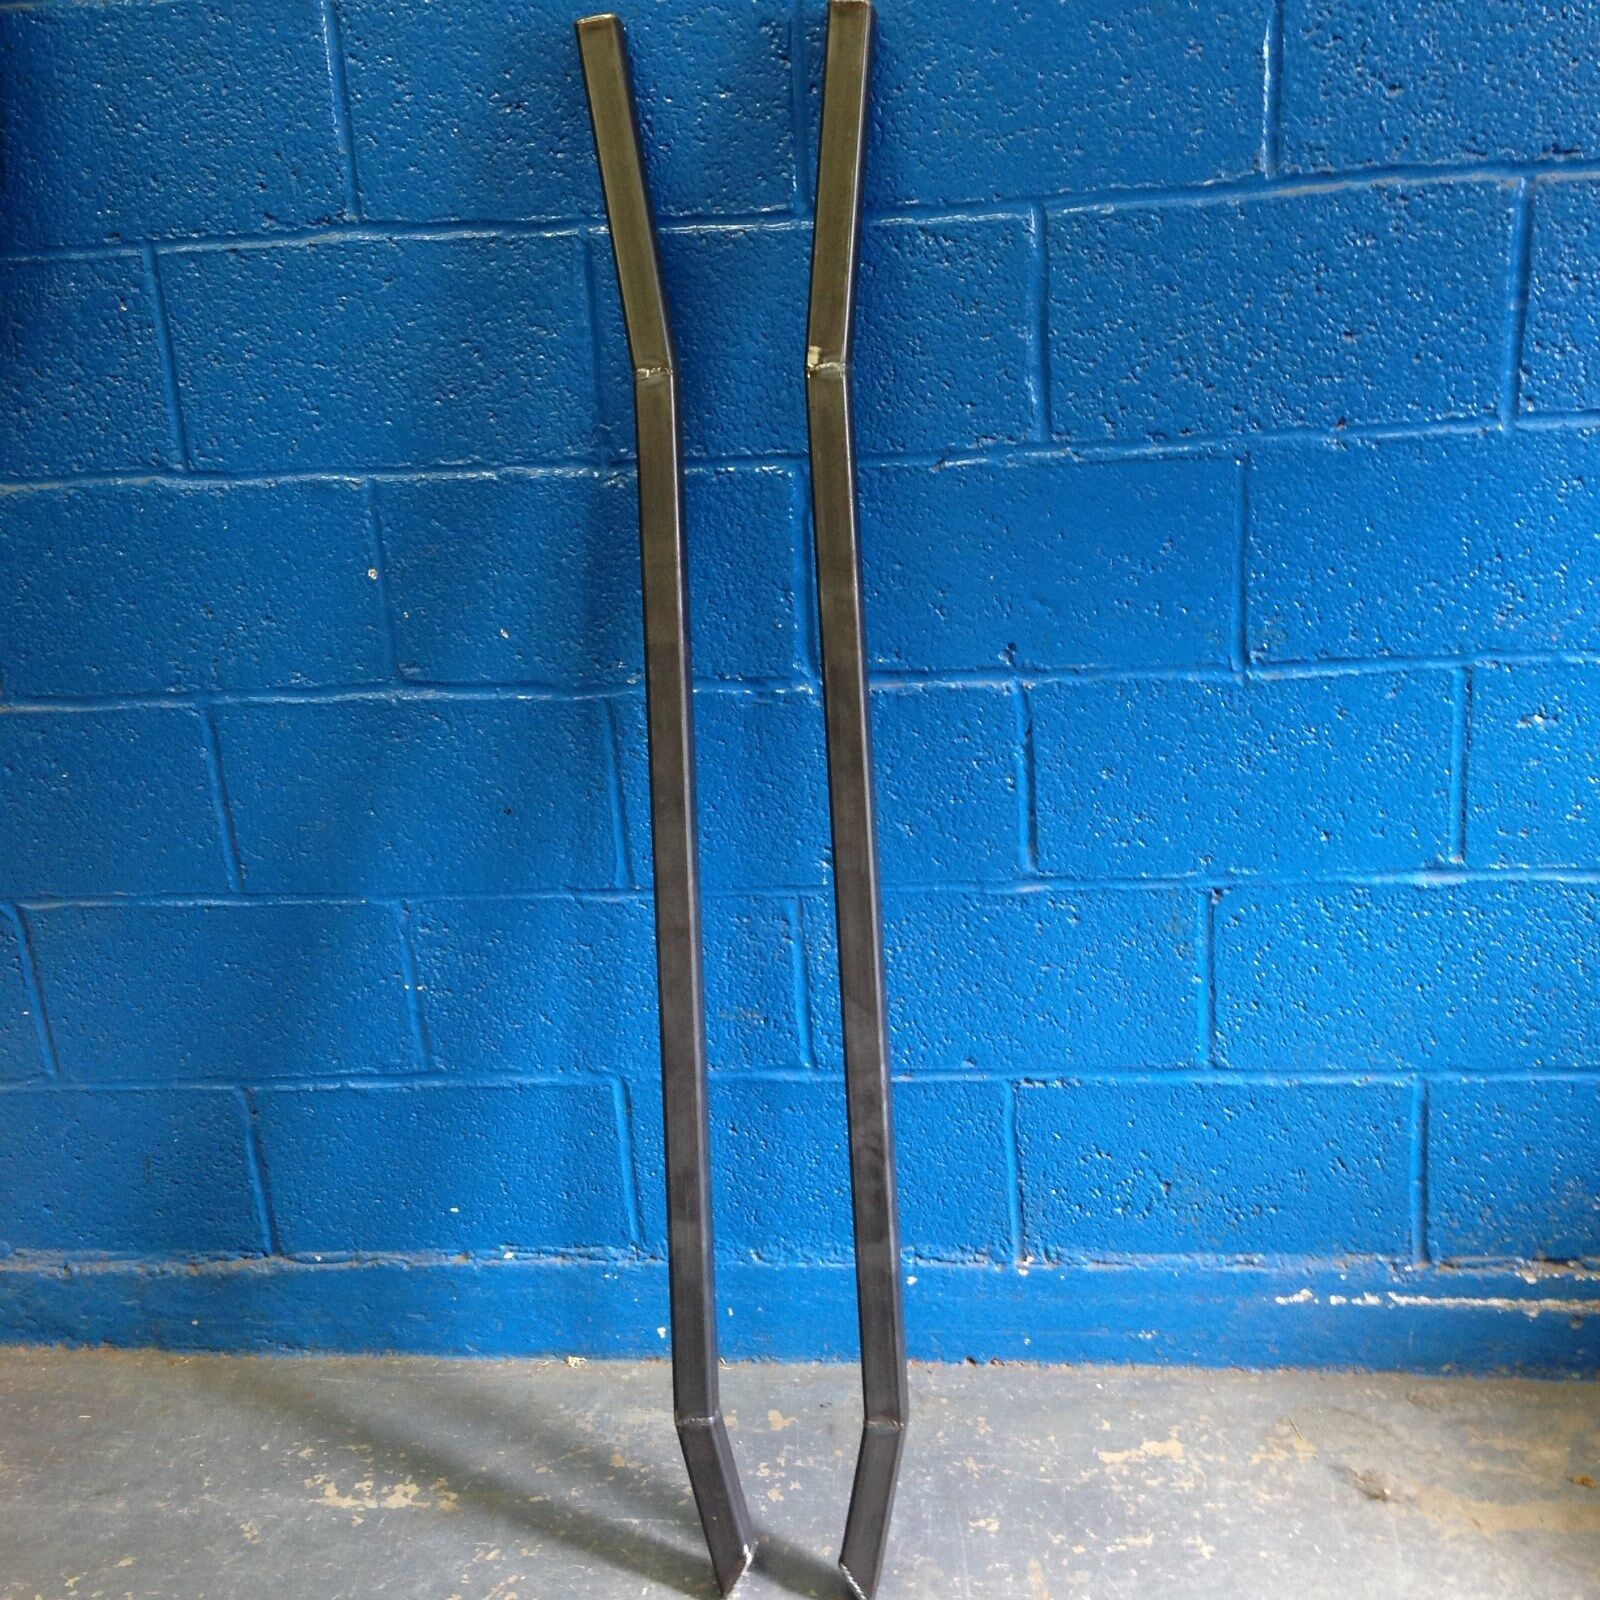
This is a fabricatedpair of subframe connectors for a 1966-1970 FordFalcon, Mercury Comet or Ford Ranchero. They are a weld in connector that is made from U.S. made1 1/2\" x 1 1/2\" x .120\" wall square tubing. They are jig built and MIG welded. The ends are capped so moisture cannot enter.They connect the front and rear subframes and tie into the seat braceunder the floor to provide a more rigid chassis structure. These connectors will provide a noticeable increase in chassis stiffness, and cut down on some of the annoying creaks and rattles. Welding is required. I accept PayPal. Made in the USA!!
-The installation instructions are located below, they do not come with the connectors as I ship the connectors bare without a box.
-WELDING AND FITTING IS REQUIRED!!
-SOME VEHICLES WILL REQUIRE NOTCHING OF THE SEAT BRACE FOR THE CONNECTORS TO FIT CORRECTLY.
-Some 1970 and 1971 Torinos and Falcons have longitudinal floor braces that run alongside the transmission. These floor braces will need to be notched for the subframe connectors to fit. Not all cars have these floor braces.
Sub Frame connectorInstallation Instructions
Some 1970 and 1971 Torinos and Falcons have longitudinal floor braces thatrun alongside the transmission. These floor braces will need to be notched forthe subframe connectors to fit. Not allcars have these floor braces.
This is set of weld in sub frame connectors. They will fit \'66-1971Falcons, Comets, and Rancheros, Torinos etc. . Due to the varying assembly linetolerances that these cars were made with, they may not be a perfect fit everytime. Every effort was made in the prototyping process to allow them to fit asmany years and models as possible. The dimensions which were settled upon weredeemed the best for use. The instructions for installation are as followed:
The connectors are tack welded together for shipping. Thetack welds are easily ground off with an angle grinder. After a few mishapswith connectors being lost or the box breaking open, this was deemed the bestway to ship these connectors, I have not had a mishap since adopting thisshipping method.
1. Thebest way to install these is with the use of a drive on vehicle lift in whichall four tires are supported as the vehicle is raised into the air. Such a liftis found in muffler and automotive repair shops. If such a lift is notavailable the vehicle will need to be raised efficiently to allow welding ofthe connectors, either by placing the car on ramps or jack stands on a nicelevel surface. Jack stands should be placed under the rear differential housingand front lower control arms so that the vehicle weight is resting on itssuspension. Failure to do this could cause the chassis to twist out of positionand cause body
2. Theconnectors are interchangeable right or left. The front of the connector is onewith a 45 degree angle cut at the end. It will weld to the outside of the frontsub frame, centered in the middle of the frame rail.(up and down) The front ofthe connector\'s front edge should be even with the seam on the front framerail. The back of the connector willweld to the bottom of the frame rail/torque box area. The connectors should be weldeddirectly under the rear frame rail on all cars except Rancheros and stationwagons. The connectors should be 2\" from the rear inside frame rail onRancheros and station wagons if possible, but under the rear frame rail is alsoacceptable.. Light adjustments in this measurement may be needed to get it tofit properly. The connector should also touch the seat brace in the middle ofthe floor. In some case the seat brace may need to be notched slightly so theconnector can touch the rear frame rail with more surface area.
3. Grindall paint, rust or undercoating from areas where the connector will weld to thecar. Use at least a 130 AMP mig welder for best results. Weld all vertical andhorizontal areas with the connector where the connector touches the front framerail seat brace and the rear frame rail. A good rust inhibiting primer shouldbe sprayed. Followed by a good coat of paint.
Call me with any questions- [phone removed by eBay]-Tom.
This is set of weld in sub frame connectors. They will fit \'66-1971Falcons, Comets, and Rancheros. Due to the varying assembly line tolerancesthat these cars were made with, they may not be a perfect fit every time. Everyeffort was made in the prototyping process to allow them to fit as many yearsand models as possible. The dimensions which were settled upon were deemed thebest for use. The instructions for installation are as followed:
The connectors are tack welded together for shipping. Thetack welds are easily ground off with an angle grinder. After a few mishapswith connectors being lost or the box breaking open, this was deemed the bestway to ship these connectors, I have not had a mishap since adopting thisshipping method.
1. Thebest way to install these is with the use of a drive on vehicle lift in whichall four tires are supported as the vehicle is raised into the air. Such a liftis found in muffler and automotive repair shops. If such a lift is notavailable the vehicle will need to be raised efficiently to allow welding ofthe connectors, either by placing the car on ramps or jack stands on a nicelevel surface. Jack stands should be placed under the rear differential housingand front lower control arms so that the vehicle weight is resting on itssuspension. Failure to do this could cause the chassis to twist out of positionand cause body
2. Theconnectors are interchangeable right or left. The front of the connector is onewith a 45 degree angle cut at the end. It will weld to the outside of the frontsub frame, centered in the middle of the frame rail.(up and down) The front ofthe connector\'s front edge should be even with the seam on the front framerail. The back of the connector willweld to the bottom of the frame rail/torque box area. The connectors should be weldeddirectly under the rear frame rail on all cars except Rancheros and stationwagons. The connectors should be 2\" from the rear inside frame rail onRancheros and station wagons if possible, but under the rear frame rail is alsoacceptable.. Light adjustments in this measurement may be needed to get it tofit properly. The connector should also touch the seat brace in the middle ofthe floor. In some case the seat brace may need to be notched slightly so theconnector can touch the rear frame rail with more surface area.
3. Grindall paint, rust or undercoating from areas where the connector will weld to thecar. Use at least a 130 AMP mig welder for best results. Weld all vertical andhorizontal areas with the connector where the connector touches the front framerail seat brace and the rear frame rail. A good rust inhibiting primer shouldbe sprayed. Followed by a good coat of paint.
Call me with any questions- [phone removed by eBay]-Tom.